Versatile Thermostat vs Better Thermostat: 10 Days of Data Changed My Mind
Better Thermostat vs Versatile Thermostat: 10 days of data, 90% less valve thrashing, 2x faster heating. Here's why I switched and the numbers that prove it.

Two days ago I wrote about the firmware lottery with MOES TRV valves and how my TRV801Z units were missing the manual mode that made Better Thermostat work smoothly. I concluded that Versatile Thermostat's "Direct Valve Control" was a dead end because the position entity is read-only.
I was wrong. Not about the position entity - that's still read-only. But about VT being a dead end.
Turns out VT doesn't need to control the valve directly. It has a different trick up its sleeve, and after running both systems in parallel with InfluxDB logging everything, I can now show you the data that convinced me to ditch Better Thermostat completely.
The misconception
In my previous article I tried configuring VT with "Direct valve control" for an over_climate setup. The idea was simple: VT calculates optimal valve opening percentage, sends it to the TRV, done.
Except TRV801Z exposes its position entity as read-only. From the Zigbee2MQTT docs:
"Position. Value can be found in the published state on the position property. It's not possible to read (/get) or write (/set) this value."
So I gave up on VT and went with Better Thermostat's Aggressive calibration mode. It worked. The room heated up. The valve oscillated like crazy between 0% and 100%, but the end result was acceptable.
What I missed: VT's over_climate mode without direct valve control uses a completely different approach. It doesn't try to control the valve at all. Instead, it manipulates what the TRV thinks it should do.
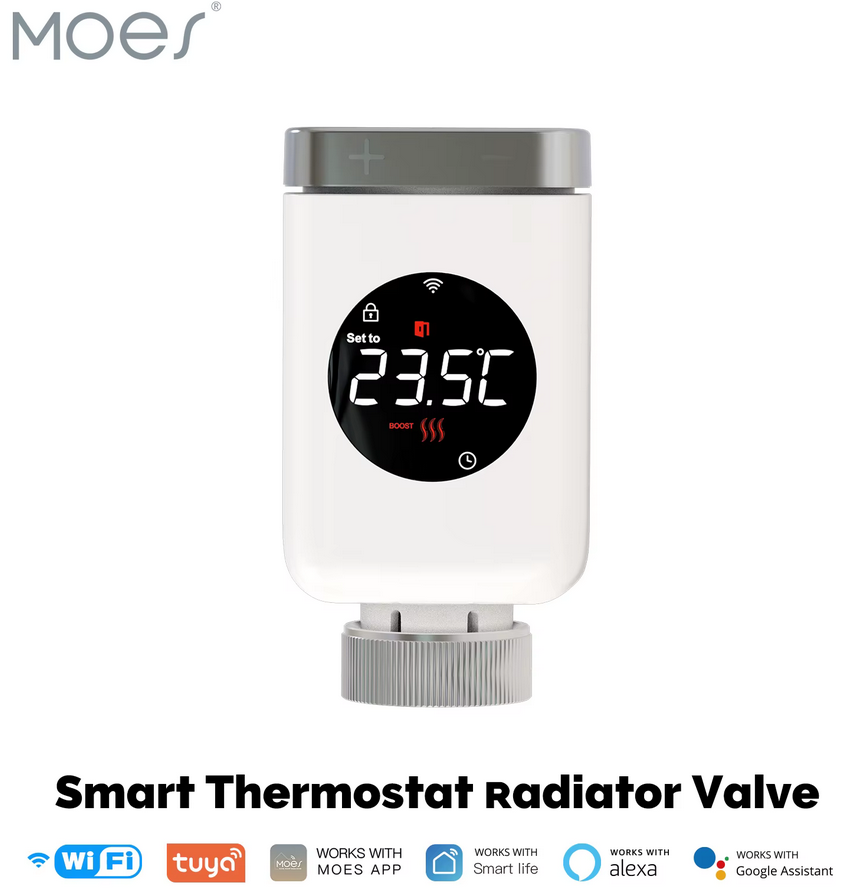
MOES TRV ZigBee - The Valve That Started It All
Smart thermostatic radiator valve with ZigBee. Works great with Home Assistant and Versatile Thermostat - even if you get the "wrong" firmware. Full comparison of TRV801_1 vs TRV801Z in the article.
How VT actually works with stubborn TRVs
When you configure VT as over_climate without direct valve control, it doesn't embed any TPI algorithm. The documentation is clear about this:
"TPI is applicable only for VTherm which does the regulation itself. This kind of VTherm is concerned: over_switch, over_valve, over_climate with direct valve control. over_climate with self-regulation that doesn't control the valve directly don't have any TPI algorithm embedded."
So what does it do instead? Self-regulation.
VT monitors the room temperature (from your external sensor, not the TRV's built-in one) and adjusts the setpoint it sends to the underlying climate entity. If the room is 19°C and you want 21.5°C, VT might tell the TRV "target is 23°C" to make it open the valve wider. As the room approaches target, VT gradually reduces this offset.
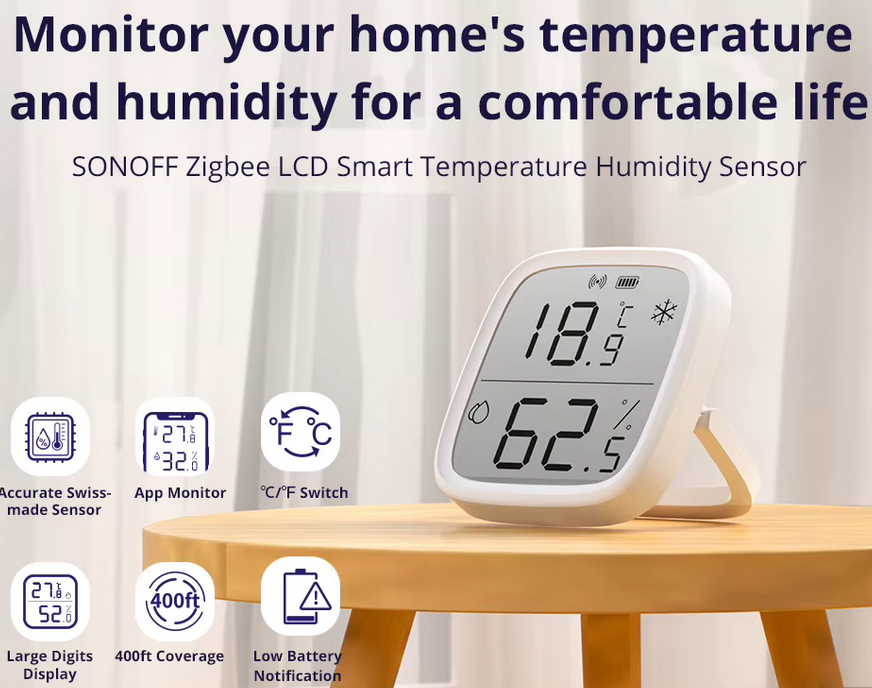
SONOFF SNZB-02D - External Temperature Sensor
TRV's built-in thermometer sits next to the radiator - it lies. This sensor with LCD display measures actual room temperature where you live. Essential for Versatile Thermostat's self-regulation to work properly. Battery lasts over a year.
The TRV still does its own internal regulation. VT just lies to it about what temperature you want.
This is fundamentally different from Better Thermostat's Aggressive mode, which rapidly switches between presets (on, comfort, auto) trying to approximate the valve position it wants. BT's approach creates those characteristic 0→100→0 oscillations I documented in my previous article.
VT's approach is gentler. The TRV gets a stable setpoint and adjusts its valve position smoothly to reach it. When VT changes the setpoint, it does so in small increments. The result: valve movements in 5% steps instead of wild jumps.
Setting up VT: the configuration flow
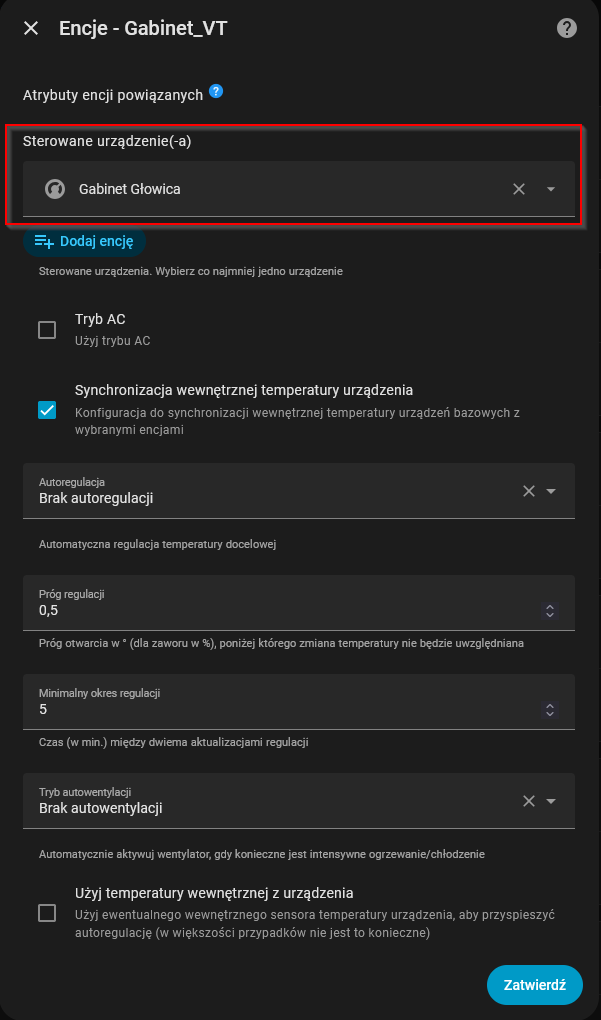
VT configuration happens through a multi-step wizard. When you add a new Versatile Thermostat, you start by selecting the type - in my case over_climate since I'm wrapping existing TRV climate entities.
The first critical step is selecting the underlying climate entity. This must be your actual Zigbee device - the climate.living_room_trv or whatever Z2M created for your TRV. Not a group, not a helper, not another virtual thermostat. The real thing.
Then you navigate through several configuration screens: temperature sensors (external thermometer, outdoor sensor), presets (Comfort, Eco, Boost temperatures), and features (window detection, motion detection, presence management). Each screen has its own set of options.

Aqara Door & Window Sensor
Open window + radiator at max = money flying out the window (literally). VT can detect open windows automatically via temperature slope, but a physical sensor is faster and more reliable. Tiny, cheap, battery lasts forever.
One thing I appreciate: VT validates your configuration at each step. If you forget to select a temperature sensor or leave a required field empty, it won't let you proceed. No more "why isn't this working" debugging sessions because you missed something three screens ago. The integration checks prerequisites before moving forward.
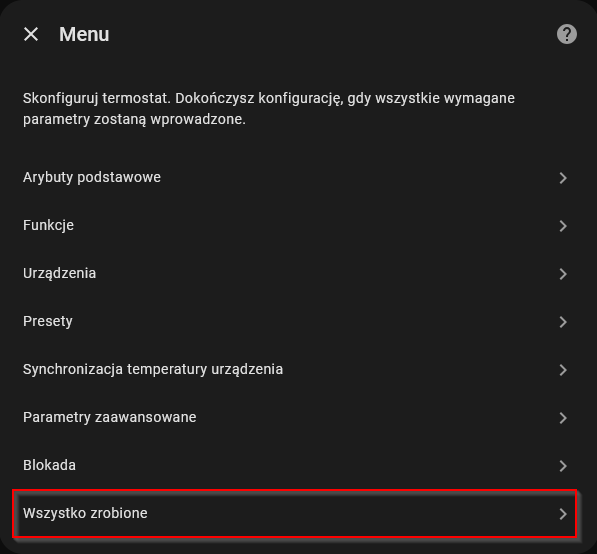
After clicking through all the menus and hitting "Finish", VT creates the virtual thermostat entity that wraps your TRV. From this point on, you control your heating through the VT entity, not the underlying TRV directly.
For over_climate without direct valve control, the key settings are:
- Self-regulation mode: Light, Medium, or Strong (how aggressively VT manipulates the setpoint)
- External temperature sensor: Your room thermometer, placed away from the radiator
- Outdoor temperature sensor: For weather compensation
I'm using Light self-regulation. It's gentle enough that the TRV doesn't freak out, but effective enough to reach target temperatures reliably.

SONOFF ZBDongle-P - ZigBee Coordinator
The foundation of any ZigBee setup with Home Assistant. Without a solid coordinator, your TRVs are just expensive thermometers. Proven, stable, affordable. Works perfectly with Zigbee2MQTT.
The real killer feature: Central Boiler
But self-regulation isn't why I switched. The real reason is Central Boiler.
My heating setup is complicated. I have a pellet boiler with a dumb controller that only knows how to maintain 65°C water temperature. It has a dry contact input: close the contact and it heats, open it and it stops. Home Assistant controls this through a Tasmota relay.
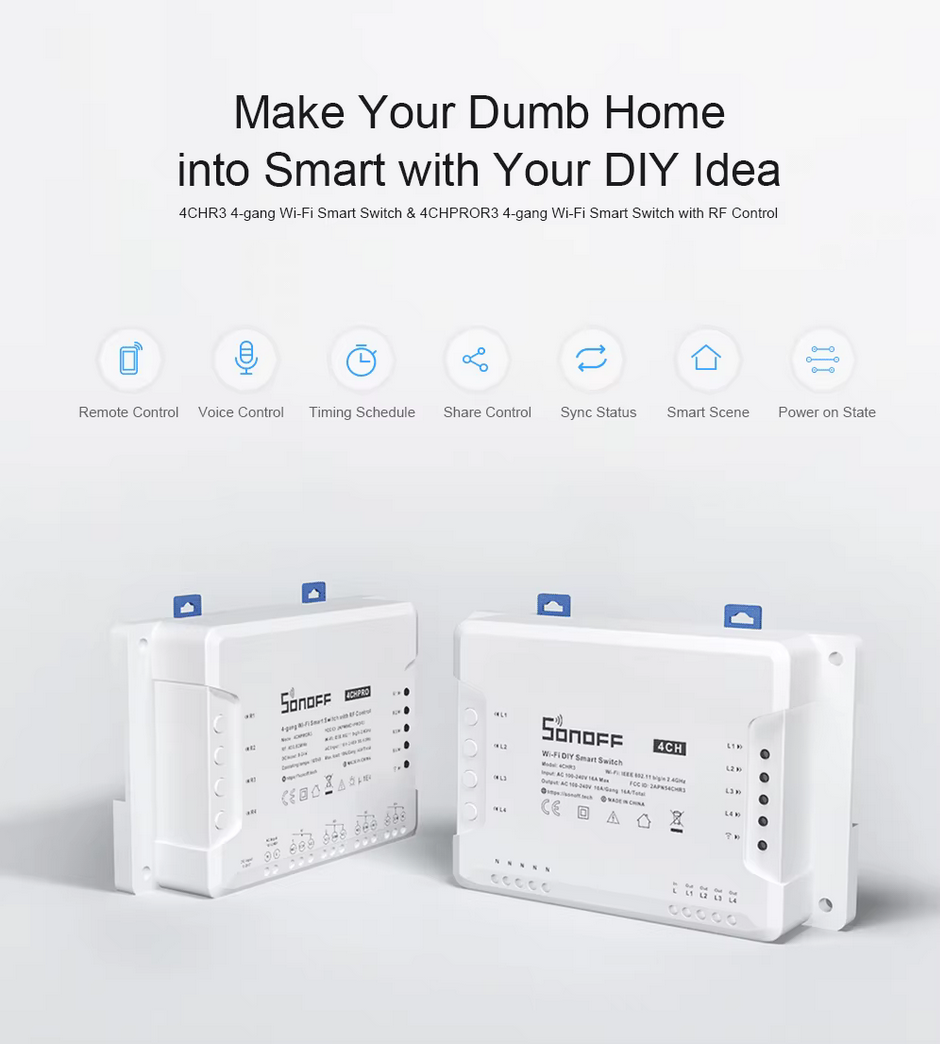
SONOFF 4CH Pro R3 - Multi-Channel Relay for Heating Control
Four independent relays in one DIN-rail unit. Perfect for controlling boiler AND pump separately - exactly what Central Boiler needs. Dry contact outputs work with any boiler's control input. Flash with Tasmota for local control without cloud dependency. I use two channels: one for boiler ignition, one for circulation pump.
The circulation pump is separate. Originally the boiler controlled it based on water temperature, but I ripped that out. The pump now runs through its own Tasmota relay because I need Home Assistant to decide when to circulate - not some fixed threshold.
This creates a coordination problem. The boiler needs 15-40 minutes of preheating before you start the pump (otherwise you're circulating cold water). The pump must stop during hot water heating (CWU priority). Everything needs to work together without race conditions.
With Better Thermostat, I had 11 automations trying to orchestrate this:
- 7 automations watching individual rooms for
hvac_actionchanges - 2 automations checking if all rooms were idle
- 1 automation running every 5 minutes to verify pump state
- 1 automation handling CWU
It worked, but barely. Race conditions happened regularly. Sometimes the pump would start before the boiler was warm. Sometimes it wouldn't start at all.
VT's Central Boiler feature replaced all of this with one binary sensor and two scripts.
How Central Boiler works
VT creates a binary_sensor.central_configuration_central_boiler that answers one question: "does anyone need heat right now?"
When the answer changes from no to yes, it calls your start script. When it changes from yes to no, it calls your stop script. That's it.
# Central Boiler configuration
activation_threshold: 1  # At least 1 device must request heat
service_start: script.heating_start_boiler_and_pump/turn_on
service_stop: script.heating_stop_boiler_and_pump/turn_on
The start script handles the complexity:
alias: "[HEATING] Start Boiler and Pump"
sequence:
  - action: switch.turn_on
    target:
      entity_id: switch.boiler

  # Skip pump control during hot water heating
  - if:
      - condition: template
        value_template: >
          {{ not (now().hour == 5 or now().hour == 18 or
                  (now().hour == 6 and now().minute < 30)) }}
    then:
      # Night (20:30-08:40): short delay, boiler still warm
      - if:
          - condition: time
            after: "20:30:00"
            before: "08:40:00"
        then:
          - delay: "00:01:00"
        else:
          # Day: full preheating
          - delay: "00:15:00"

      # Re-check if heat is still needed after delay
      - if:
          - condition: state
            entity_id: binary_sensor.central_configuration_central_boiler
            state: "on"
        then:
          - action: switch.turn_on
            target:
              entity_id: switch.pump
        else:
          # False alarm - turn off boiler
          - action: switch.turn_off
            target:
              entity_id: switch.boiler
The re-check after the delay is important. VT might request heat, then decide 10 minutes later that it's warm enough. Without the re-check, you'd turn on the pump for no reason.
The stop script protects CWU:
alias: "[HEATING] Stop Boiler and Pump"
sequence:
  - action: switch.turn_off
    target:
      entity_id: switch.pump  # Always safe

  # Protect boiler during CWU
  - if:
      - condition: template
        value_template: >
          {{ not (now().hour == 5 or
                  (now().hour == 6 and now().minute < 30) or
                  now().hour == 18) }}
    then:
      - action: switch.turn_off
        target:
          entity_id: switch.boiler
My automation count went from 11 to 4:
- Morning preheating at 08:40
- Night ECO mode at 20:30
- CWU morning (05:00-06:30)
- CWU evening (18:00-19:00)
VT handles everything else through Central Boiler.
The data: 10 days of BT vs VT
I ran both systems and logged everything to InfluxDB. Better Thermostat from January 1-7, Versatile Thermostat from January 8-11.
The weather wasn't cooperative. BT period averaged -2.8°C outside. VT period averaged -7.1°C. So VT had to work 2.5x harder just to maintain the same indoor temperatures.
Extracting the data
Here's the Flux query I used to pull everything into Chronograf:
from(bucket: "home_assistant/autogen")
  |> range(start: -10d)
  |> filter(fn: (r) =>
    // Room temperatures
    r["entity_id"] == "termometr_room1_temperature" or
    r["entity_id"] == "termometr_bedroom_temperature" or
    r["entity_id"] == "termometr_room2_old_temperature" or
    r["entity_id"] == "office_temperature" or
    // Valve positions
    r["entity_id"] == "pokoj_room1_position" or
    r["entity_id"] == "bedroom_position" or
    r["entity_id"] == "pokoj_room2_position" or
    r["entity_id"] == "office_glowica_position" or
    // Outside temperature
    r["entity_id"] == "outside_temperature" or
    // Boiler and pump
    r["entity_id"] == "kociol_grzanie" or
    r["entity_id"] == "tasmota_2"
  )
  |> filter(fn: (r) => r["_field"] == "value")
  |> aggregateWindow(every: 5m, fn: mean, createEmpty: false)
  |> group(columns: ["entity_id"])
Frankly speaking, visualizing this data in Chronograf is a mess. You end up with 15+ lines on a single chart, overlapping scales (temperatures in °C, valve positions in %, boiler state as 0/1), and it's nearly impossible to see patterns clearly.

What actually works: export to CSV, open in Excel or LibreOffice Calc, and analyze columns separately. Filter by date ranges, calculate daily statistics, look for patterns. The raw data tells the story much better than any graph I could produce.
Here's what I found.
Valve behavior
This is the most dramatic difference. I counted valve position changes larger than 10% per day.
| Period | Avg jumps/day | Outside temp |
|---|---|---|
| BT (Jan 1-7) | 9-21 | -2.8°C avg |
| VT transition (Jan 8) | 22 | -7.5°C |
| VT stable (Jan 9-11) | 1-2 | -8.6 to -2.0°C |
From 9-21 jumps per day down to 1-2. That's a 90% reduction in valve thrashing. And this happened despite VT dealing with significantly colder weather.
The pattern tells the story even better. Here's a typical BT sequence from January 2nd (Room1 valve position over time):
40→45→40→35→30→25→30→35→40→45→60→65→60→55→50
Range: 10% to 100%. Chaotic jumps every few minutes.
And VT from January 9th:
65→70→75→80→85→90→95→100→95→90→85→80
Range: 55% to 100%. Smooth 5% steps. The valve opens gradually as the room heats up, then closes gradually as it approaches target. No seizures.
Here's what VT's self-regulation looks like in practice (Staircase valve, January 8th morning):
09:05: 30%
09:10: 35% (+5%)
09:15: 40% (+5%)
09:20: 45% (+5%)
09:25: 50% (+5%)
09:30: 55% (+5%)
09:35: 60% (+5%)
09:40: 65% (+5%)
09:45: 70% (+5%)
Perfect 5% increments every 5 minutes. The TRV is finally behaving because VT isn't screaming contradictory commands at it.
Heating speed
Morning warmup from 08:40 to 11:00. I measured temperature rise per hour in each room.
| Room | BT speed | BT outside | VT speed | VT outside |
|---|---|---|---|---|
| Room1 | 0.52°C/h | +2.9°C | 1.11°C/h | -7.8°C |
| Office | 0.44°C/h | +2.9°C | 1.11°C/h | -5.5°C |
| Room2 | 0.55°C/h | +2.9°C | 0.99°C/h | -7.8°C |
VT heats rooms twice as fast despite 10°C colder outside. How? Consistent valve positions mean consistent water flow. The boiler doesn't have to deal with constantly changing demand. It reaches 65°C and stays there, delivering steady heat.
Overheating (wasted energy)
I checked how often rooms exceeded target (21.5°C) and how often they went significantly over (22.5°C).
| Room | BT >22.5°C | VT >22.5°C |
|---|---|---|
| Office | 38% of daytime | 0% |
| Room2 | 20% | 1% |
| Bathroom | 20% | 9% |
Office went from 38% overheating to zero. Every degree above target is energy flying out the window. With BT, the valve would slam open, overshoot the target, then slam closed. With VT, it gradually reduces opening as target approaches.
Temperature stability
Daily temperature swing during heating hours (10:00-20:00):
| Room | BT range | VT range | Improvement |
|---|---|---|---|
| Bedroom1 | 7.7°C | 3.0°C | -60% |
| Office | 5.3°C | 3.5°C | -34% |
| Room1 | 6.0°C | 4.7°C | -22% |
Bedroom1 used to swing by almost 8 degrees throughout the day. Now it's 3 degrees. That's the difference between "why is it so hot/cold" and "I didn't notice the heating at all."
Estimated pellet savings
| Metric | BT | VT |
|---|---|---|
| Outside temp (avg) | -2.8°C | -7.1°C |
| Boiler ON time | 47% | 43% |
| Weather-normalized | 47% | ~38% |
Normalizing for the 4.3°C temperature difference (roughly 3% more heat demand per degree), VT would use about 38% boiler time in equivalent conditions vs BT's 47%.
Estimated savings: 15-20% less pellet from:
- Fewer boiler startups (each ignition wastes pellets)
- Less overheating (heat stays in the house)
- Smoother regulation (boiler runs at steady state)
Problems I encountered
Threshold = 0 means always on
When configuring Central Boiler, I set the activation threshold to 0 devices. Seemed logical - "if zero or more devices need heat, turn on."
Except 0 >= 0 is always true. The boiler never turned off.
Solution: activation_threshold: 1. Now it correctly evaluates "does at least 1 device need heat?"
2-minute boiler cycles at night
First night with ECO mode (17°C target), the boiler did useless 2-minute cycles. On at 22:06, off at 22:08. On at 22:23, off at 22:25.
The problem: my start script had a 15-minute pump delay for preheating. VT would request heat, boiler would start, but no pump meant no heat transfer. Temperature didn't rise. VT gave up after 2 minutes.
Solution: reduced night delay to 1 minute. The boiler is still warm from evening heating - no need for 15-minute preheating at 2 AM.
CWU race conditions
Hot water heating runs at 05:00-06:30 and 18:00-19:00. During this time, the pump must stay off so all heat goes to the water tank.
The risk: what if VT requests heat at 18:30? The start script would eventually turn on the pump, ruining CWU.
Solution: time-based exclusions in both scripts. The start script skips pump control during CWU hours. The stop script protects the boiler from being turned off during CWU. VT can request whatever it wants - the scripts know better.
TRV falling asleep
The TRV801Z occasionally goes unavailable despite strong Zigbee signal (LQI 255). The device just stops responding.
Workaround: toggle frost_protection on and off. This wakes it up immediately. I'm considering a keep-alive automation that does this every 30 minutes for the problematic valve.
The UI: Versatile Thermostat Card and Dashboard
Before diving into configuration details, let's talk about how you actually interact with this thing day-to-day.
Versatile Thermostat UI Card
VT has a dedicated card available through HACS: versatile-thermostat-ui-card. This isn't just another thermostat card with a temperature dial. It's built specifically for VT and exposes all the features the integration offers.
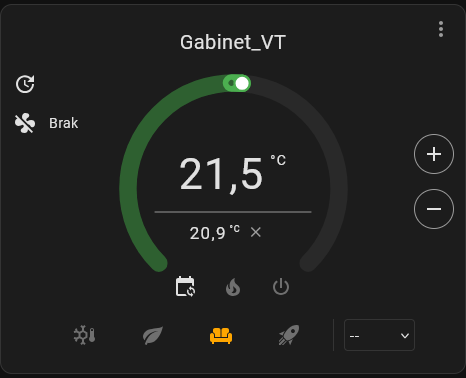
The card shows:
- Current temperature and target setpoint (obviously)
- Active preset with one-click switching (Comfort, Eco, Boost, etc.)
- Heating/cooling status with visual indicators
- Window detection status - if VT detected an open window, you'll see it
- Motion and presence status when configured
- Power management state during load shedding
- Lock icon for PIN-protected thermostats
What I appreciate: when VT overrides your settings (window detected, overpowering active, auto-start/stop kicked in), the card shows a small info icon. Click it and you get an explanation of why your thermostat isn't doing what you asked. No more guessing why the target temperature changed on its own.
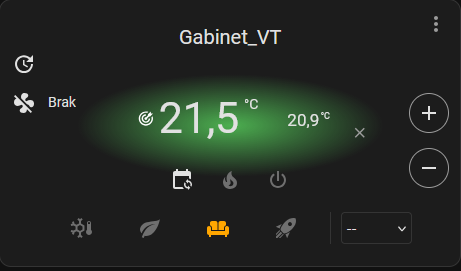
The card also supports a compact mode - you can disable the circular dial and get a minimal view that works better on dashboards with multiple rooms. When you have 7 thermostats to monitor, you don't need seven giant circles. The compact view gives you the essentials: room name, current temp, target, and status.
type: custom:versatile-thermostat-ui-card
entity: climate.living_room_vt
disable_circle: true
disable_menu: true
Speaking of dashboards
VT creates a lot of additional entities beyond just the climate. Each thermostat comes with sensors for power consumption, on_percent (how much the heating is working), temperature slope, and more. Central Boiler adds its own binary sensor and device counter. All of this is dashboard material.
I built a dedicated heating dashboard using Mushroom cards that shows everything at a glance:
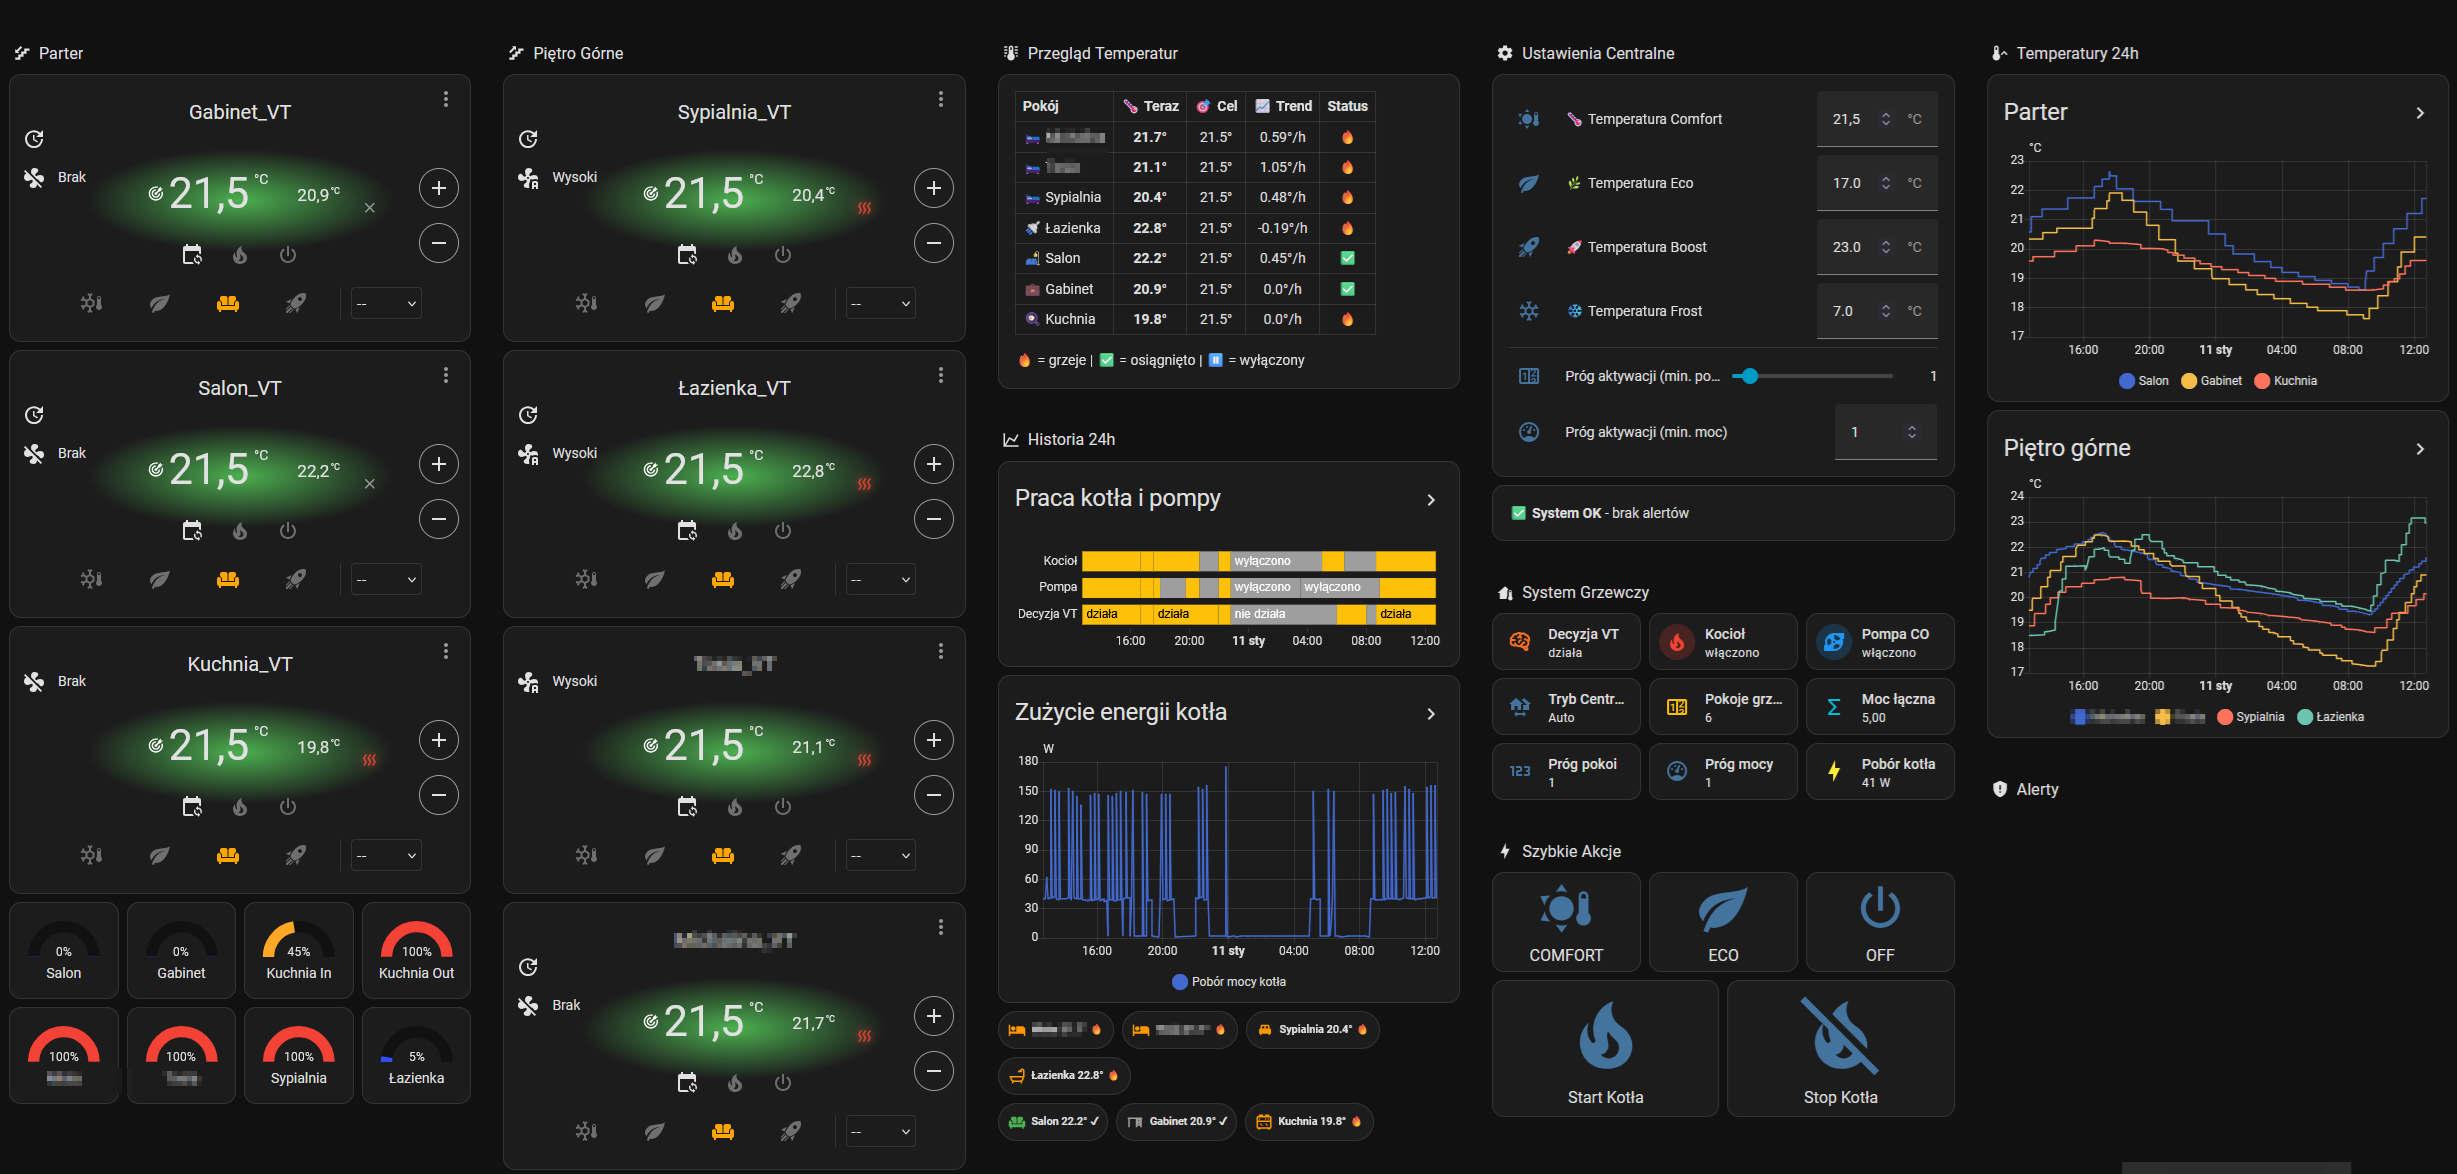
The layout:
- Room cards: Each room gets a Mushroom climate card showing current temperature, target, and valve position as a gauge
- Boiler section: Water temperature with color coding (blue when cold, orange when heating, red when hot)
- History graphs: Charts showing temperature trends and valve positions over time
The Mushroom climate cards work great with VT entities. They pick up the hvac_action attribute automatically, so you see at a glance which rooms are actively heating (orange glow) vs idle (gray). Combined with position gauges, you get immediate feedback on what your heating system is actually doing.
Here's a sample card for one room:
type: custom:mushroom-climate-card
entity: climate.room1_vt
icon: mdi:radiator
fill_container: true
hvac_modes:
  - auto
  - heat
  - "off"
show_temperature_control: true
collapsible_controls: true
And a valve position gauge:
type: gauge
entity: sensor.room1_trv_position
min: 0
max: 100
severity:
  green: 0
  yellow: 50
  red: 80
The combination of VT UI Card for detailed control and Mushroom cards for overview gives you the best of both worlds. Tap a room for full VT controls, or just glance at the dashboard to see system state.
Configuration summary
VT over_climate settings
| Setting | Value | Why |
|---|---|---|
| Type | over_climate | TRV801Z has climate entity |
| Direct valve control | OFF | Position is read-only |
| Self-regulation | Light | Gentle setpoint manipulation |
| External temp sensor | Room thermometer | Not the TRV's built-in one |
| Window detection | Auto (slope-based) | No physical sensors needed |
TRV settings in Z2M
| Setting | Value | Why |
|---|---|---|
| Preset | comfort | Enables smooth 0-100% valve control |
| Hysteresis | comfort | Same - avoids binary on/off |
The hysteresis: comfort is critical. Without it, the TRV does binary on/off instead of proportional valve control.
Central Boiler settings
| Setting | Value |
|---|---|
| Activation threshold | 1 |
| Service start | script.heating_start_boiler_and_pump/turn_on |
| Service stop | script.heating_stop_boiler_and_pump/turn_on |
What I learned
My previous article concluded that VT's direct valve control doesn't work with TRV801Z. That's still true. But I stopped too early.
VT's over_climate without direct valve control is a different beast entirely. It doesn't fight the TRV's internal regulation - it works with it. The TRV thinks it's in charge. VT just whispers suggestions about what temperature would be nice.
The result: smooth valve movements, consistent heating, and a Central Boiler feature that finally solved my pellet boiler + separate pump coordination nightmare.
BT was fine for simple setups. One room, one radiator, no complications - it works. But my 7-room, pellet boiler, separate pump, dual CWU cycle setup needed something more capable.
VT delivered. The data proves it.
The TRV801Z firmware lottery didn't matter after all. VT found a way.
SONOFF TRVZB - The VT-Friendly Alternative
If MOES firmware lottery scares you, SONOFF TRVZB is a safer bet. VT has dedicated support for this valve including offset calibration and direct opening/closing degree control. Slightly more expensive but more predictable. I'm considering these for my next upgrade.
System: Home Assistant 2026.1, Versatile Thermostat 8.5.1, 8x MOES TRV (TRV801_1/TRV801Z mixed), Zigbee2MQTT, pellet boiler with external control, Tasmota relays for boiler and pump, InfluxDB for data collection.
Previous article: The Holy Grail of Heating Thermostats: A Plot Twist (TRV801Z vs TRV801_1)
Buy Me a Coffee
Fuel my creativity with a coffee — every sip keeps this blog running!

Support This Blog — Because Heroes Deserve Recognition!
Whether it's a one-time tip or a subscription, your support keeps this blog alive and kicking. Thank you for being awesome!
Tip OnceHey, Want to Join Me on This Journey? ☕
While I'm brewing my next technical deep-dive (and probably another cup of coffee), why not become a regular part of this caffeinated adventure?
Subscribe