The Lazy Sysadmin's Guide to UPS Battery Calibration: When You Refuse to Leave Your Desk
Replaced UPS batteries but runtime dropped? The APC remembers old capacity. Instead of shutting down my homelab and fumbling with cables, I calibrated the UPS remotely via Home Assistant's NUT addon using raw netcat commands. Runtime nearly doubled. Zero cables touched.

Or: How I Calibrated My APC Back-UPS Without Touching a Single Cable, Thanks to Home Assistant and Some Creative Protocol Abuse
It was December 28th, the last Saturday of 2025. The year was ending, and so was my UPS battery capacity. I had just replaced the old Green Cell 12V 10Ah batteries (vintage 2020) in my APC Back-UPS XS 1400U with shiny new CSB UPS12460 F2 units. These CSB batteries are supposedly the cream of the crop for UPS applications - higher discharge rates, better performance under load, the works.
One small problem: after the swap, the runtime display dropped from 584 seconds to 520 seconds. With the same load. With allegedly better batteries.
The UPS was lying to me. And I had to teach it the truth.

The Problem: UPS Memory Is Longer Than an Elephant's
Here's the thing about UPS devices - they remember their battery characteristics. The APC Back-UPS had learned over years exactly how much juice it could squeeze from those old Green Cell batteries. Now, with fresh CSBs installed, it was still using the old profile. Worse, it was showing a battery manufacture date of 2001/09/25. I wasn't even running a homelab in 2001.
The traditional solution? Simple:
- Shut down the homelab
- Disconnect everything from UPS
- Plug in a laptop via USB
- Install APC PowerChute software
- Run calibration
- Reconnect everything
- Pray nothing breaks during restart
But here's where my laziness kicked in. My UPS powers a significant chunk of my homelab infrastructure through an XCP-NG virtualization cluster. The USB connection goes through passthrough to a Home Assistant VM. To use PowerChute, I'd need to either:
- Shut down the entire homelab (my annual shutdown quota was already used up, thank you very much)
- Mess with XCP-NG USB passthrough to redirect to a Windows VM
- Physically stand next to the UPS with a laptop like some kind of cave person
None of these options appealed to me. It's 2025. There had to be a better way.
The Setup: What I Was Working With
My APC Back-UPS XS 1400U was connected via USB to Home Assistant OS, managed through the Network UPS Tools (NUT) addon. In the HA dashboard, I could see everything:
Device: Back-UPS XS 1400U
Manufacturer: American Power Conversion
Serial: xxx

Status: Online
Battery Charge: 100%
Load: 31%
Input Voltage: 226V
Battery Runtime: 600s
Battery Date: 2001/09/25  ← This is obviously wrong
Battery Mfr Date: 2023/03/14  ← Also wrong
The NUT addon was working perfectly for monitoring. But could I use it for control?

The Investigation: What Can Home Assistant Actually Do?
SSH into Home Assistant OS gives you a surprisingly limited environment. It's basically a stripped-down Alpine Linux with bash and not much else:
[core-ssh ~]$ upsc -l
-bash: upsc: command not found
No NUT client tools in the base system. The NUT addon runs in its own container, isolated from the SSH environment. And Home Assistant OS doesn't give you direct Docker access either:
[core-ssh ~]$ docker ps
-bash: docker: command not found
No Docker access either. But Home Assistant has its own CLI for managing addons. First, let me find the NUT addon:
[core-ssh ~]$ ha addons | grep nut
  slug: a0d7b954_nut
  url: https://github.com/hassio-addons/addon-nut
Got it. Now let's see what we're working with:
[core-ssh ~]$ ha addons info a0d7b954_nutThis dumped a wall of YAML with everything about the addon - its Docker network configuration, available options, schema definition, and most importantly:
ip_address: 172.30.33.2
network:
  3493/tcp: null
host_network: false
So the addon was running on an internal IP and exposing port 3493 (NUT's default). The host_network: false setting meant it was isolated in its own network namespace.
Maybe I could execute commands directly inside the container?
[core-ssh ~]$ ha addons exec a0d7b954_nut -- upscmd -l apcThis just dumped a list of all installed addons instead of executing anything in the NUT container. The ha addons exec command apparently doesn't work the way you'd expect from Docker.
Time to get creative.

The Breakthrough: Network Protocol to the Rescue
The NUT addon exposes its service on the internal Docker network. Checking the addon info revealed the IP address:
ip_address: 172.30.33.2
And NUT's default port is 3493. Could I just... talk to it directly?
[core-ssh ~]$ which nc
/usr/bin/nc
Netcat was available. Time to speak NUT protocol:
[core-ssh ~]$ nc 172.30.33.2 3493
LIST UPS
BEGIN LIST UPS
UPS apc "APC Back-UPS 700VA"
END LIST UPS
It responded! Now let's see what commands this UPS supports:
LIST CMD apc
BEGIN LIST CMD apc
CMD apc beeper.disable
CMD apc beeper.enable
CMD apc beeper.mute
CMD apc load.off
CMD apc shutdown.reboot
CMD apc test.battery.start.deep
CMD apc test.battery.start.quick
CMD apc test.battery.stop
CMD apc test.panel.start
CMD apc test.panel.stop
END LIST CMD apc
There it was: test.battery.start.deep. This is the runtime calibration command. It runs the UPS on battery until it reaches about 25% charge, measuring actual capacity along the way.

The Calibration: Moment of Truth
First, I needed to authenticate:
USERNAME nut
OK
PASSWORD password
OK
Then, the magic command:
INSTCMD apc test.battery.start.deep
OK
No sound, no blinking lights on the UPS. Did it work?
I checked Home Assistant. The status had changed:
Status: Online, Battery Discharging
Data State: OL DISCHRG
Battery Charge: 83%
Self-test Result: In progress
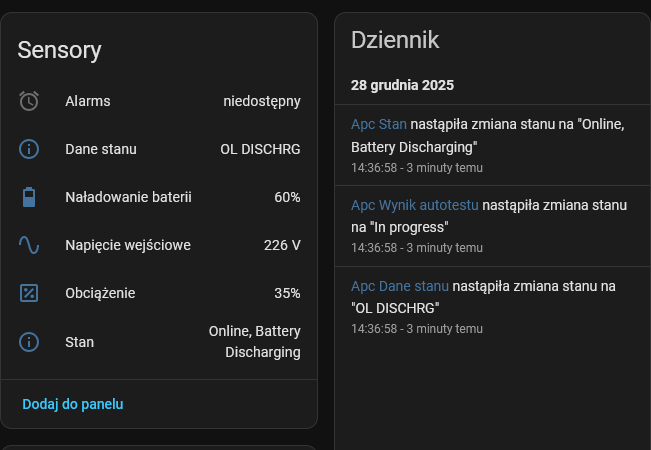
It was working! The UPS was now running on battery power, discharging to calibrate its runtime estimation. I watched the numbers drop over the next 10 minutes:
- 83% → 472s runtime
- 50% → battery warning threshold
- 24% → calibration complete
Status: Online, Battery Charging
Self-test Result: Done and passed

The Results: Runtime Nearly Doubled
After the calibration completed and the battery charged back to 100%, the numbers told the story:
| Metric | Before | After |
|---|---|---|
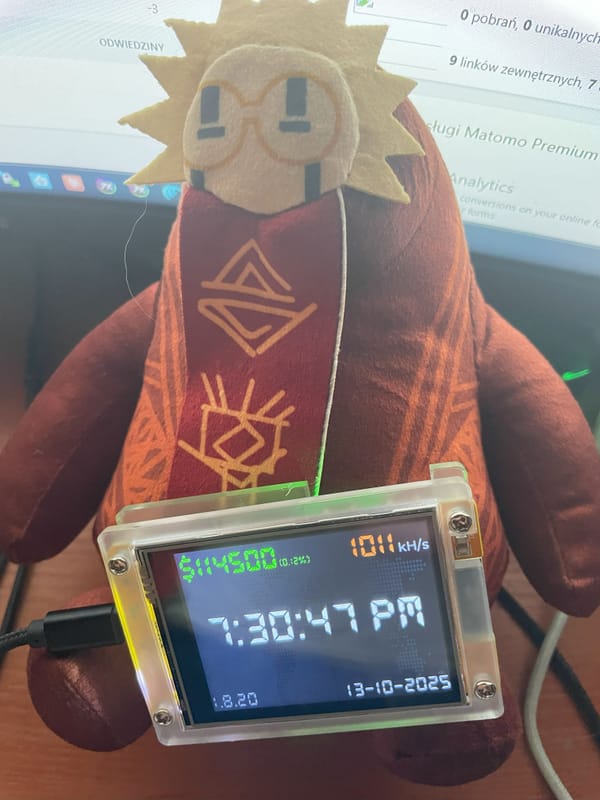
| Runtime @ 32% load | 520-600s | 1036s |
| Battery Mfr Date | 2023/03/14 | 2025/12/28 |
From ~9 minutes to over 17 minutes of runtime. Those CSB batteries weren't lying about their superior performance after all - the UPS just needed to learn about them.

Bonus: Fixing the Battery Date
During my netcat adventures, I also discovered you can query writable variables:
LIST RW apc
BEGIN LIST RW apc
RW apc battery.charge.low "10"
RW apc battery.mfr.date "2023/03/14"
RW apc battery.runtime.low "120"
RW apc input.sensitivity "medium"
RW apc input.transfer.high "280"
RW apc input.transfer.low "155"
RW apc ups.delay.shutdown "20"
END LIST RW apc
The battery manufacture date was writable! But when I tried to set it:
SET VAR apc battery.mfr.date "2025/12/28"
ERR ACCESS-DENIED
The NUT user didn't have SET permissions. Quick fix in Home Assistant:
Settings → Add-ons → Network UPS Tools → Configuration
Changed the user config from:
users:
  - username: nut
    password: password
    instcmds:
      - all
    actions: []
To:
users:
  - username: nut
    password: password
    instcmds:
      - all
    actions:
      - SET
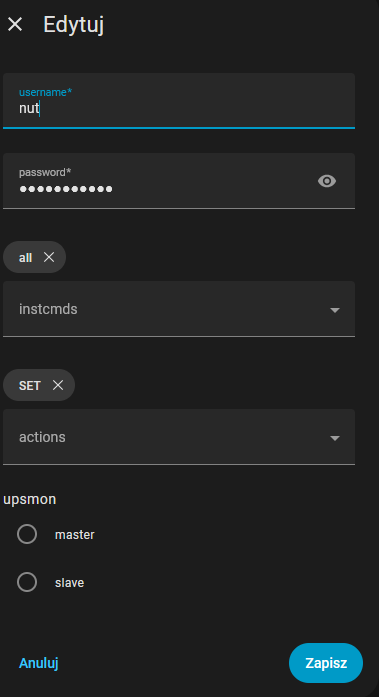
After addon restart:
SET VAR apc battery.mfr.date "2025/12/28"
OK
The annoying 2001 date (battery.date) couldn't be changed through NUT - that's locked in the UPS firmware. But at least the manufacture date now shows when the batteries were actually installed.
The Complete Guide: How to Calibrate Your UPS via Home Assistant
For anyone else who wants to avoid the laptop-and-cable dance:
Prerequisites
- Home Assistant with NUT addon installed and configured
- SSH access to Home Assistant OS
- UPS connected via USB with working NUT monitoring
- Batteries fully charged (100%)
- Some patience (calibration takes 15-30 minutes depending on load)
Step 1: Connect to NUT via netcat
nc [NUT_ADDON_IP] 3493
Find your addon IP in: Settings → Add-ons → Network UPS Tools → Info
Step 2: Authenticate and check available commands
USERNAME [your_nut_username]
PASSWORD [your_nut_password]
LIST CMD [ups_name]
Step 3: Run deep battery test (calibration)
INSTCMD [ups_name] test.battery.start.deep
Step 4: Monitor progress in Home Assistant
Watch the UPS sensors. Status will show "Battery Discharging" and self-test will show "In progress".
Step 5: Wait for completion
The UPS will discharge to ~25%, then switch back to line power and start charging. Self-test result will change to "Done and passed".
Step 6: (Optional) Update battery date
First, enable SET permission in the addon config, then:
SET VAR [ups_name] battery.mfr.date "YYYY/MM/DD"
Lessons Learned
- NUT protocol is simple and text-based - you can talk to it with netcat if you don't have proper client tools installed.
- Deep battery test is the calibration you need - it's not just a health check, it's how the UPS learns your battery capacity.
- Home Assistant OS is more capable than it looks - even without Docker access, basic networking tools are available.
- CSB UPS12460 batteries are excellent - nearly double the runtime compared to standard Green Cell units in the same form factor.
- Always check variable permissions - NUT separates INSTCMD (instant commands) from SET (variable modification) permissions.
Hardware Specifications
For the curious, here's exactly what I used:
UPS:
- APC Back-UPS XS 1400U (BX1400U-GR)
- Nominal power: 700W
- Battery configuration: 2x 12V in series (24V nominal)
Old batteries (removed):
- Green Cell AGM 12V 10Ah (AGM50)
- Installed: July 2020
- Runtime at 31% load: ~520-600s
New batteries (installed):
- CSB UPS12460 F2 (12V 9.6Ah high-rate)
- 460W per cell at 5-minute rate
- Runtime at 32% load: 1036s
The CSB batteries are specifically designed for high-current discharge applications. They're rated for 460W per cell at a 5-minute discharge rate, compared to standard batteries that struggle above 300W. This makes them perfect for UPS applications where you need maximum power delivery during outages.
Total time spent: 30 minutes Cables touched: 0 Homelab shutdowns: 0 Annual shutdown quota remaining: Still exhausted from that ZFS incident
Sometimes the lazy way is the smart way. Now if you'll excuse me, I need to figure out why my UPS still thinks it was manufactured during the Bush administration.
Buy Me a Coffee
Fuel my creativity with a coffee — every sip keeps this blog running!

Support This Blog — Because Heroes Deserve Recognition!
Whether it's a one-time tip or a subscription, your support keeps this blog alive and kicking. Thank you for being awesome!
Tip OnceHey, Want to Join Me on This Journey? ☕
While I'm brewing my next technical deep-dive (and probably another cup of coffee), why not become a regular part of this caffeinated adventure?
Subscribe