
Complete Guide: Setting Up a Custom Validated Domain for Your Homelab in 2025
Transform your homelab with a custom validated domain using Nginx Proxy Manager, Cloudflare, and wildcard SSL. Access services through clean, secure URLs instead of IP addresses and ports.

Running a homelab is incredibly rewarding, but accessing your services securely can be challenging. Instead of remembering multiple IP addresses and ports, imagine accessing your services through clean URLs like vaultwarden.yourdomain.xyz or homeassistant.yourdomain.xyz with proper SSL certificates.
In this comprehensive guide, I'll show you how to set up a custom validated domain for your homelab, complete with SSL certificates, local DNS resolution, and seamless access to all your services.
Why Use a Custom Domain for Your Homelab?
- Professional appearance: Access services via clean URLs instead of
192.168.1.100:8080 - SSL/TLS security: Get free valid certificates for all services
- Internal subdomain organization: Organize services with descriptive subdomains
- External access: Securely expose services to the internet when needed
- Automated certificate renewal: Never worry about expired certificates
My Homelab Infrastructure
Before we dive in, here's my setup that this guide is based on:
Hardware:
- Intel N100 with 16GB RAM (main services)
- Intel N200 with 32GB RAM (backup services)
- Supermicro server with Atom C2758 CPU 8 cores and 32 GB ECC DDR3 RAM (NFS storage)
Software Stack:
- XCP-NG (virtualization)
- Debian VMs running Docker containers
- Nginx Proxy Manager (NPM) in Docker
- AdGuard Home (local DNS)
Services Running (27+ services including):
- Nextcloud
- Vaultwarden
- Home Assistant
- Plex
- All *arr suite
- AdGuard
- And many more...
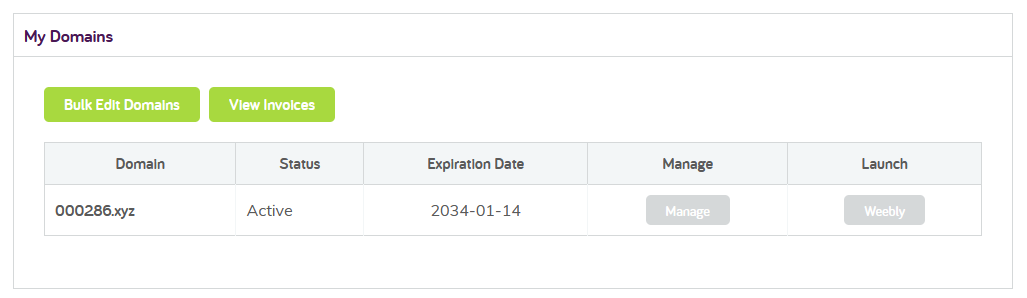
Step 1: Domain Selection and Purchase
For this setup, I chose a .xyz domain for several reasons:
- Cost-effective: I got a numeric domain for 10 years at just $10. Numeric domains from 6 and more numbers are 99c/Year - https://gen.xyz/number
- No restrictions: .xyz domains have minimal registration restrictions
- Good for homelabs: Numeric domains are perfect for technical setups
You can of course choose any valid TLD domain, but for now numeric xyz are the cheapest, and it looks for me kind of cool with vintahe 286 (CPU model number :)
Domain Selection Tips
Numeric domains (like 000286.xyz) have advantages:
- Always available
- No trademark issues
- Easy to remember
- Perfect for technical projects
Step 2: Cloudflare Configuration
I love self-hosting, but running NPM with BIND and auth keys was a nightmare requiring additional scripts because there's no native integration from NPM to manage BIND zones. I simply gave DNS management to Cloudflare at the registrar level. No worries - DNS on Cloudflare's free plan is more than enough.
Cloudflare provides excellent DNS management and integrates seamlessly with NPM.
Transfer DNS to Cloudflare
- Sign up for Cloudflare (if you haven't already)
- Add your domain to Cloudflare
- Update nameservers at your domain registrar
- Wait for DNS propagation (usually 15-30 minutes)
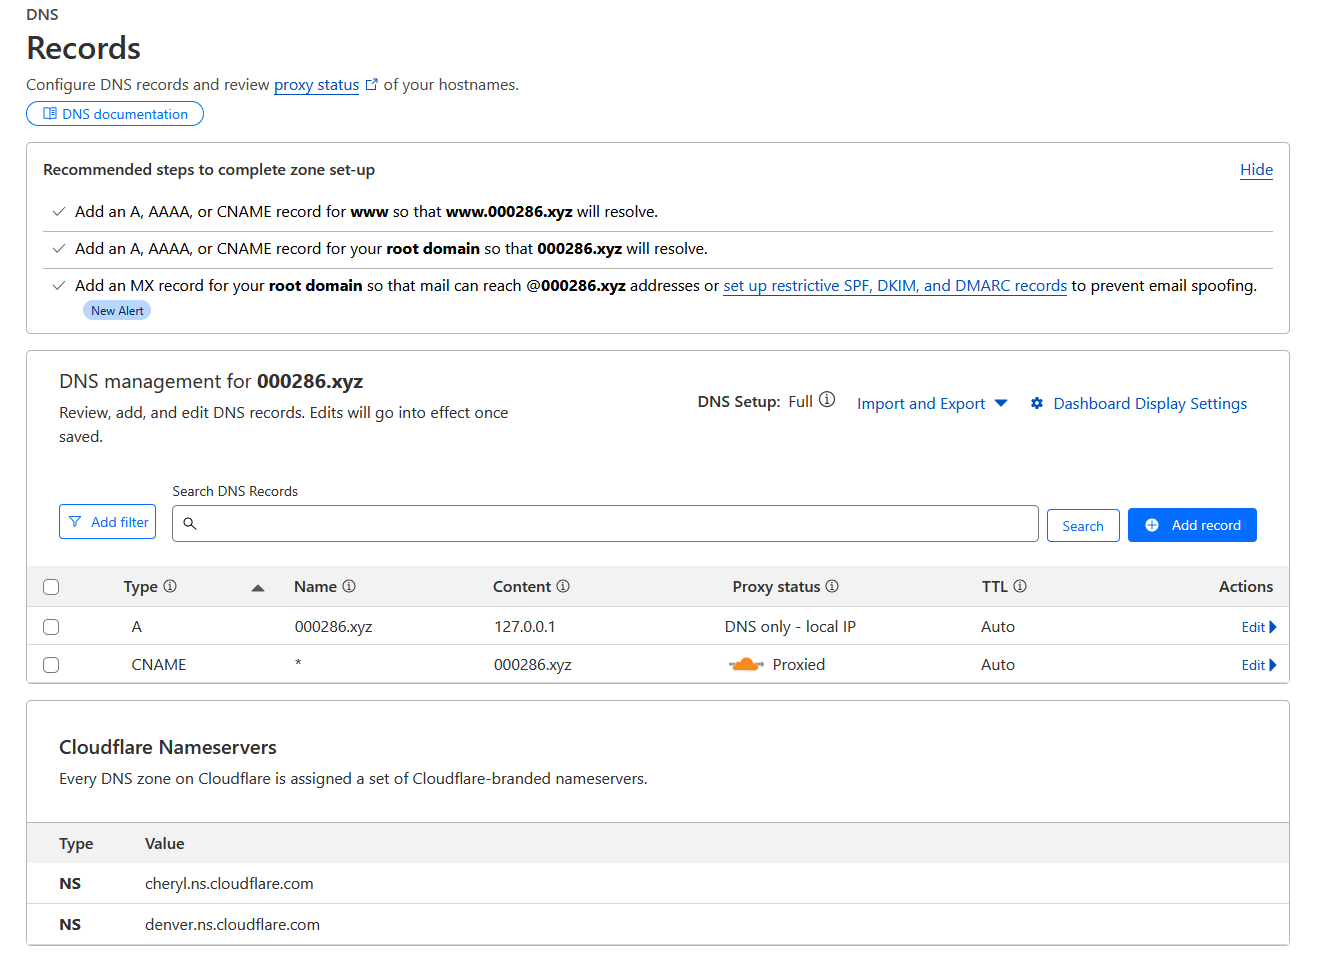
- Configure minimal and kind of nonsensical zone that points everything to
127.0.0.1
This approach enhances privacy - any query from outside will just be pointed to localhost, while everything works perfectly inside your network. We need something available from the internet to actually get an SSL certificate. Here is minimal setup:
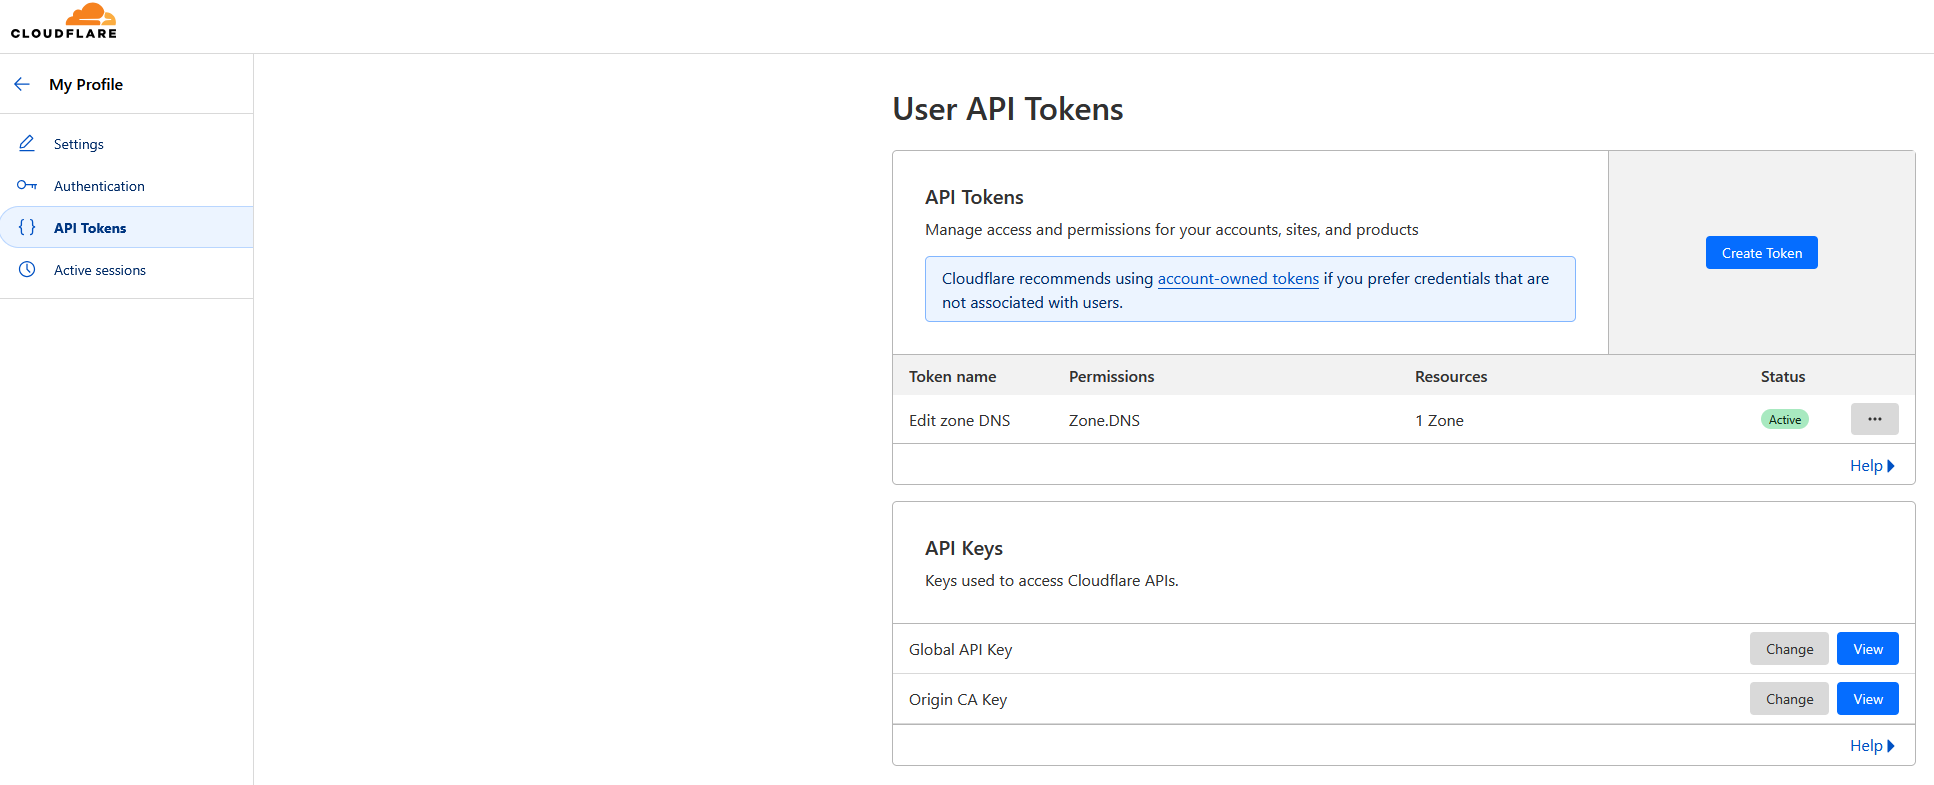
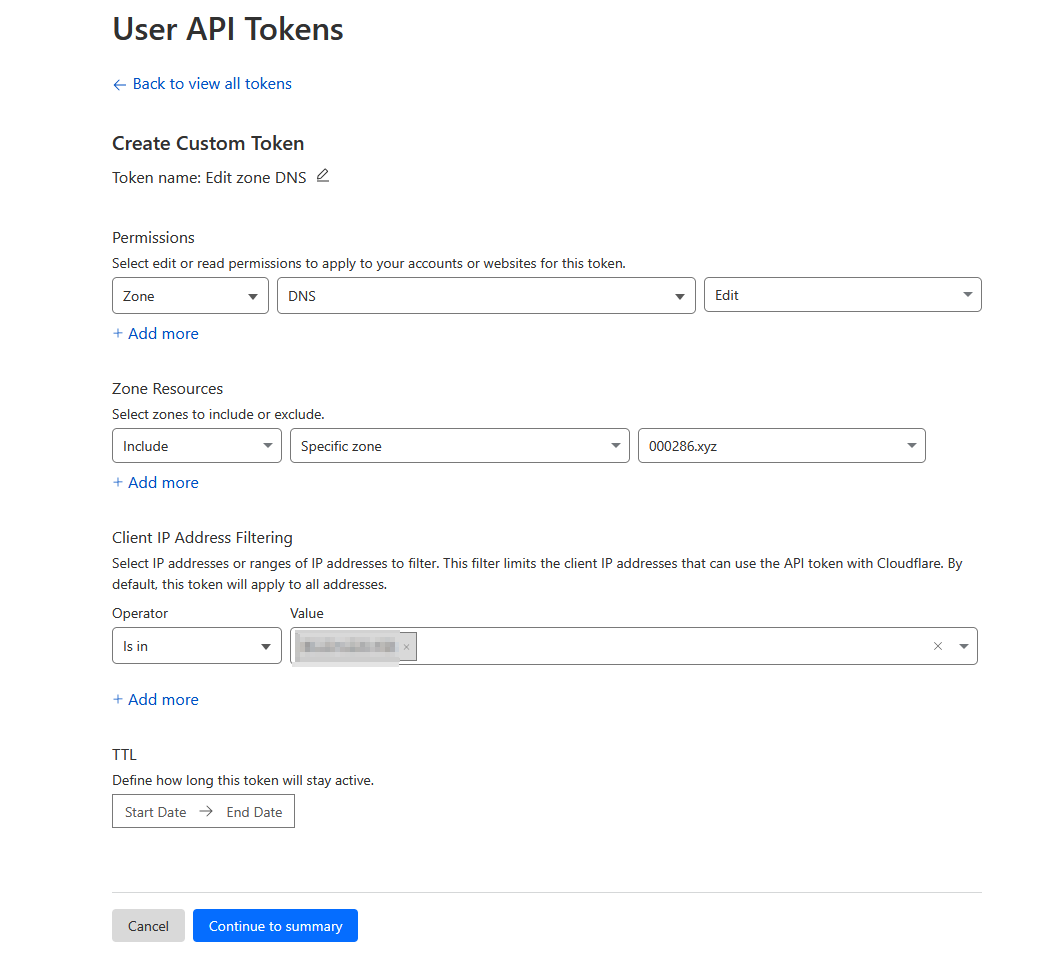
Generate Cloudflare API Token
- Navigate to Cloudflare dashboard
- Go to "My Profile" → "API Tokens"
- Click "Create Token"
- Use the "Custom token" template
- Set permissions:
- Zone: Zone Settings
- Zone: Zone
- Zone: DNS
- Add zone resources: Include your domain. If you have a static IP, limit it to only that IP for changes
- Click "Continue to summary" and then "Create Token"
- Save this token securely - you'll need it for NPM
Step 3: Nginx Proxy Manager Setup
If you're using Docker (which I recommend), here's my NPM configuration in docker-compose:
version: '3'
services:
  nginx-proxy-manager:
    image: 'jc21/nginx-proxy-manager:latest'
    restart: unless-stopped
    ports:
      - '80:80'
      - '81:81'
      - '443:443'
    volumes:
      - ./data:/data
      - ./letsencrypt:/etc/letsencrypt
    networks:
      - proxy
    environment:
      # Uncomment this if IPv6 is not enabled
      # DISABLE_IPV6: 'true'

networks:
  proxy:
    external: true
Initial NPM Configuration
- Access NPM at
http://your-server-ip:81 - Default credentials:
admin@example.com/changeme - Change admin password immediately
Step 4: Cloudflare Integration with NPM
Configure NPM to use Cloudflare DNS for certificate validation:
- In NPM, go to Settings → SSL Certificates
- Add your Cloudflare API and wildcard domain, so it will be just one to handle all:
Step 5: SSL Certificate Generation
Generate Wildcard Certificate
This is where the magic happens! Generate a single wildcard certificate for all subdomains:
- In NPM, click "SSL Certificates"
- Click "Add SSL Certificate"
- Choose "Let's Encrypt" as provider
- Enter domain names:
*.000286.xyz
- Enable "Use a DNS Challenge"
- Select "Cloudflare" as DNS Provider
- Enter your Cloudflare API token
- Click "Save"
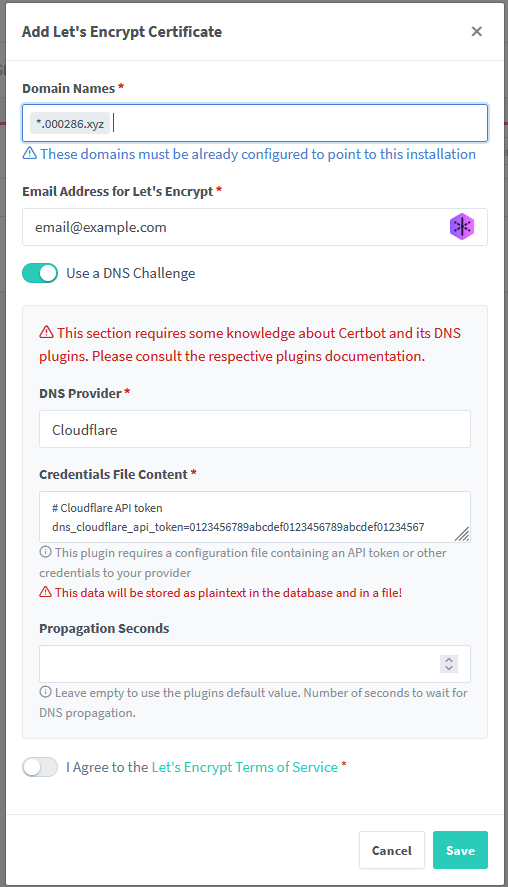
NPM will automatically generate and install the wildcard certificate!
Ignore any Status indicators in red for now - this simply means the certificate isn't yet used on any proxy host, not that something is wrong with it.

Step 6: Local DNS Configuration
For internal access without going through the internet:
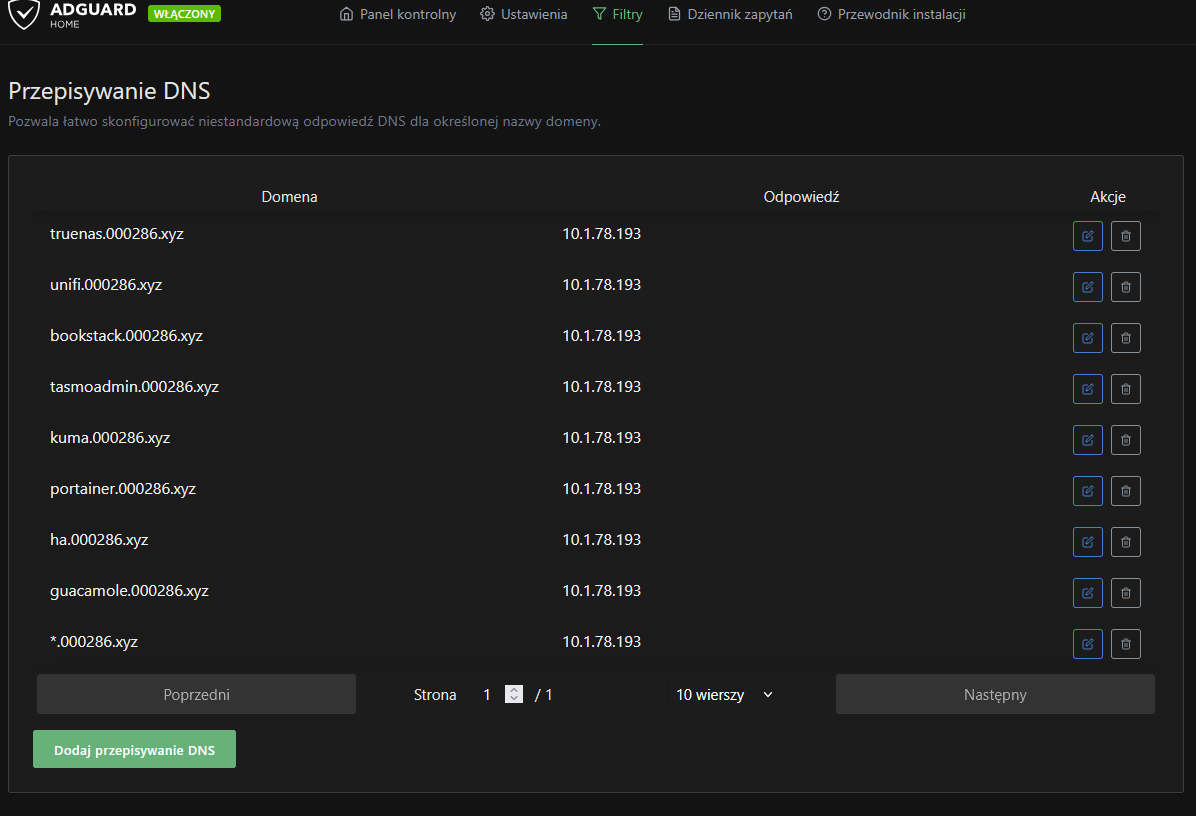
AdGuard Configuration
- Access AdGuard Home admin panel
- Navigate to "DNS rewrites"
- Add a wildcard entry:
- Domain:
*.000286.xyz - Answer:
<NPM_CONTAINER_IP>(e.g.,10.1.78.93)
- Domain:
- You can add specific services if you want more granular control, have two NPMs, or aren't using a wildcard domain. Anything is possible.
Alternative: Using hosts file
If not using AdGuard, add entries to your system's hosts file:
10.1.78.93 vaultwarden.000286.xyz
10.1.78.93 homeassistant.000286.xyz
10.1.78.93 nextcloud.000286.xyz
... add all your subdomains
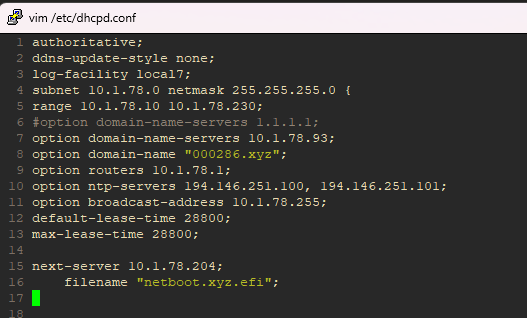
Step 7: DHCP Domain Suffix
Configure your router's DHCP server to append the domain suffix automatically:
- Access your router's admin panel or configuration file. I'm still using old ISC DHCP which is more mature and flexible, instead of KEA
- Navigate to DHCP settings
- Set domain suffix to
000286.xyz - Clients can now access services as
serviceinstead ofservice.000286.xyz
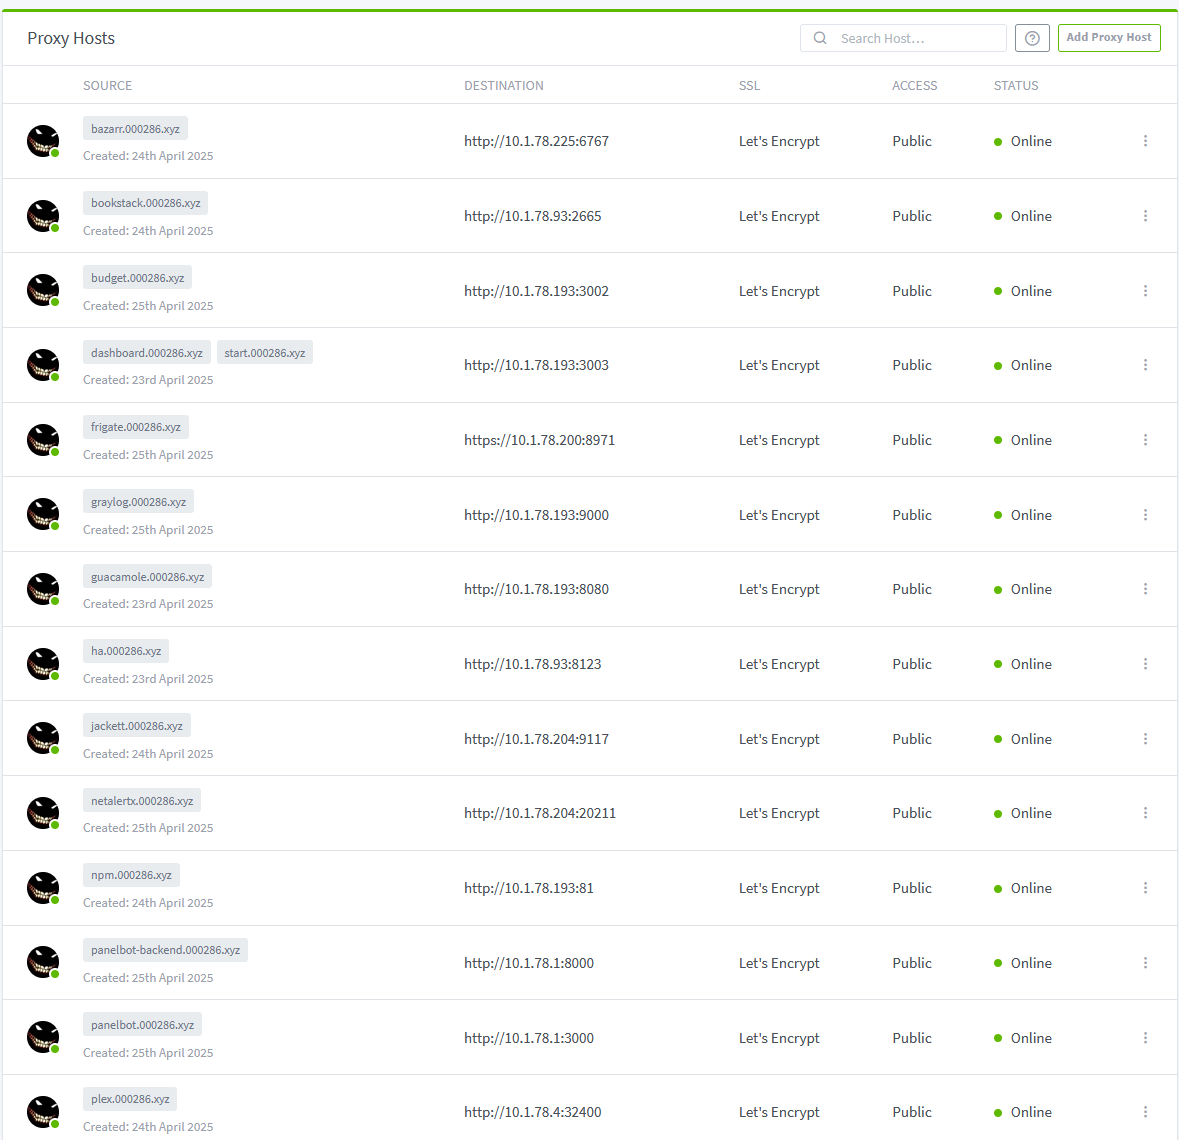
Step 8: Create Proxy Hosts
Now for the exciting part - add your services to NPM:
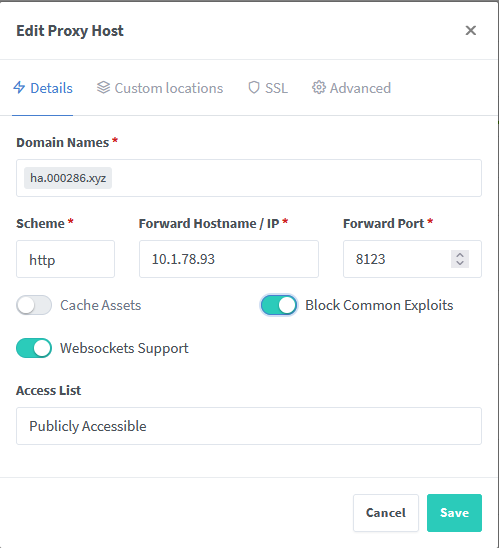
Example: Home Assistant
- Click "Proxy Hosts" → "Add Proxy Host"
- Configure:
- Domain Names:
ha.000286.xyz - Scheme:
http - Forward Hostname:
10.1.78.93 - Forward Port:
8123 - SSL Certificate: Select your wildcard certificate
- SSL: Force SSL enabled
- HTTP/2 Support: enabled
- Enable Websocket
Example: Guacamole
Sometimes there's a need for more configuration if a service is served in a format like: http://10.1.78.193:8080/guacamole/#/. If you want to access it from https://guacamole.000286.xyz/, there's an Advanced tab to handle this with custom nginx configs:
- Add another proxy host
- Configure
- Domain Names:
guacamole.000286.xyz - Scheme:
http - Forward Hostname:
10.1.78.193 - Forward Port:
8080 - SSL Certificate: Select your wildcard certificate
- Websocket: Enable
- SSL: Force SSL enabled
- HTTP/2 Support: enabled
- Advanced part:
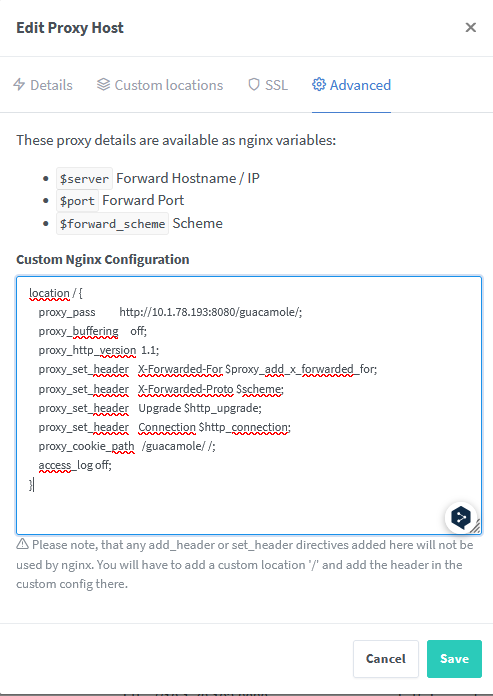
location / {
    proxy_pass          http://10.1.78.193:8080/guacamole/;
    proxy_buffering     off;
    proxy_http_version  1.1;
    proxy_set_header    X-Forwarded-For $proxy_add_x_forwarded_for;
    proxy_set_header    X-Forwarded-Proto $scheme;
    proxy_set_header    Upgrade $http_upgrade;
    proxy_set_header    Connection $http_connection;
    proxy_cookie_path   /guacamole/ /;
    access_log off;
}
Repeat this process for all your services! It is satysfying and worth it even with minor problems here and there:
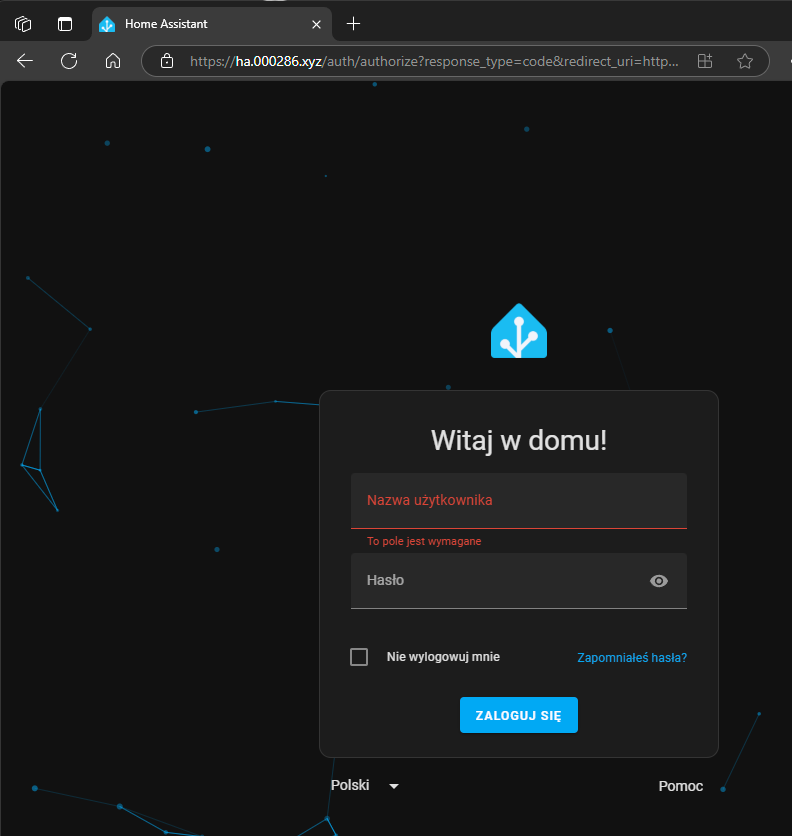
Step 9: Testing and Verification
Test each service:
- Open a browser
- Navigate to
https://service.yourdomain.xyz - Verify SSL certificate is valid
- Enjoy secure, local and no warning access!
Best Practices and Security Tips
Network Security
- Use VPN for external access instead of direct exposure
- Allow only one IP/Network to access Cloudflare if possible. Enable 2FA for registrar and Cloudflare
- Use AdGuard or Pi-Hole not just for local DNS rewrites but for protection
NPM Security
- Strong admin password: Use a password manager
- 2FA: Enable two-factor authentication if available
- Block AI: NPM has built-in AI blocking capability
SSL Best Practices
- Automatic renewal: NPM handles this for Let's Encrypt (it's default with NPM)
- Strong ciphers: NPM defaults are good, but you can customize
- HSTS: Enable HTTP Strict Transport Security
Troubleshooting Common Issues
Certificate Generation Fails
- Verify Cloudflare API token has correct permissions, and actually generate one for your domain! There's an API in the domain panel called Zone ID and Account ID, but this won't allow you to change anything from NPM. You have to generate a dedicated API token for this
- Check NPM logs:
docker logs nginx-proxy-manager - Ensure domain DNS is properly configured
Internal DNS Not Working
- Verify AdGuard/Pi-hole is used as DNS server
- Check DHCP settings for proper DNS server assignment
- Test with
nslookup service.yourdomain.xyz
Access Issues
- Confirm proxy host is enabled in NPM
- Check target service is running on correct port
- Verify network connectivity between NPM and target
Homelab Hardware Recommendations
Based on my experience, here's what works well:
Mini PCs

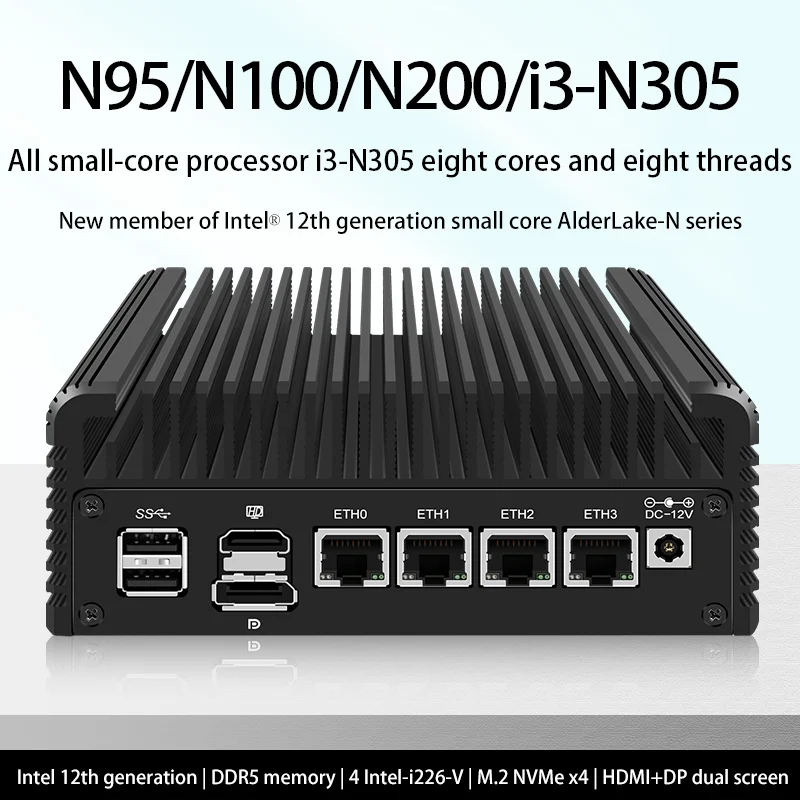
- Intel N200 systems: More power for intensive services
- Intel N305 systems: 8 CPU high end mini PC!
Conclusion
Setting up a custom domain for your homelab transforms how you access and manage your services. With proper SSL certificates, internal DNS resolution, and organized proxy hosts, your homelab becomes a professional-grade infrastructure.
The initial setup might seem complex, but the benefits are enormous:
- Secure access to all services
- Professional appearance
- Simplified service management
- Foundation for advanced networking
Start with a few services and gradually expand your setup. Before you know it, you'll have a fully-featured homelab accessible through clean, secure URLs!
Additional Resources
- Nginx Proxy Manager Documentation
- Cloudflare API Documentation
- HomeAssistant with NPM Guide
- Docker Compose Examples
Buy Me a Coffee
Fuel my creativity with a coffee — every sip keeps this blog running!

Support This Blog — Because Heroes Deserve Recognition!
Whether it's a one-time tip or a subscription, your support keeps this blog alive and kicking. Thank you for being awesome!
Tip OnceHey, Want to Join Me on This Journey? ☕
While I'm brewing my next technical deep-dive (and probably another cup of coffee), why not become a regular part of this caffeinated adventure?
Subscribe


